The lounge room clock was faulty and would not keep correct time. I’d tried replacing the battery however it would soon start lagging again. One thing worse than a clock that’s stopped is a clock that starts and stops – such a waste of time! I don’t wear a watch and kept glancing up at the blank wall where the clock should be, so I knew it was about time to get this fixed.
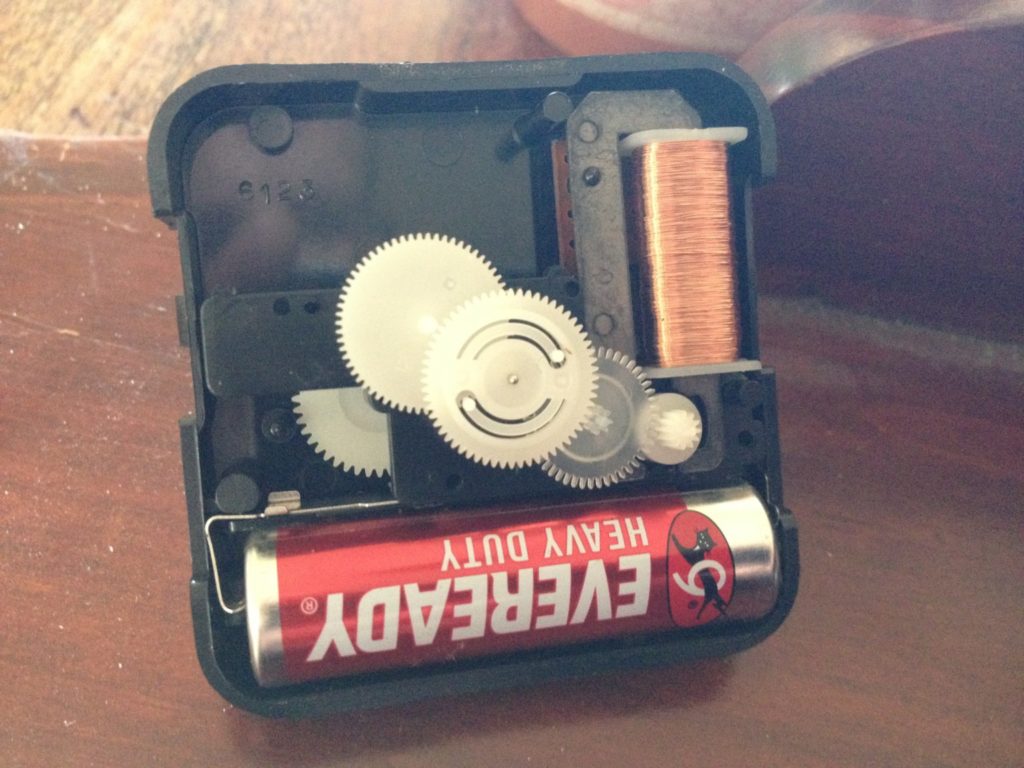
I’ve pulled many things apart before, and found that without a reference it’s often a case of trial an error to put it back together correctly. So without a second thought, I took a close up photo geared towards showing the minute details of the clock mechanism:
Clock mechanism
After removing the battery terminal, cogs and wound coil, the cause of the problem was soon obvious – green corrosion around the power supply on the circuit board.
To fix this:
Wash away green oxide buildup using methylated spirits and a cotton stick
Clean off the oxide using a smooth file or fine sand paper
Wash remaining oxide using more metho
Reassemble the clock mechanism, using the photo as a reference for the gears
Insert a fresh battery
Wait for a second
Everything went together again, and I’ve not lost any more time on this clock for a few months now.
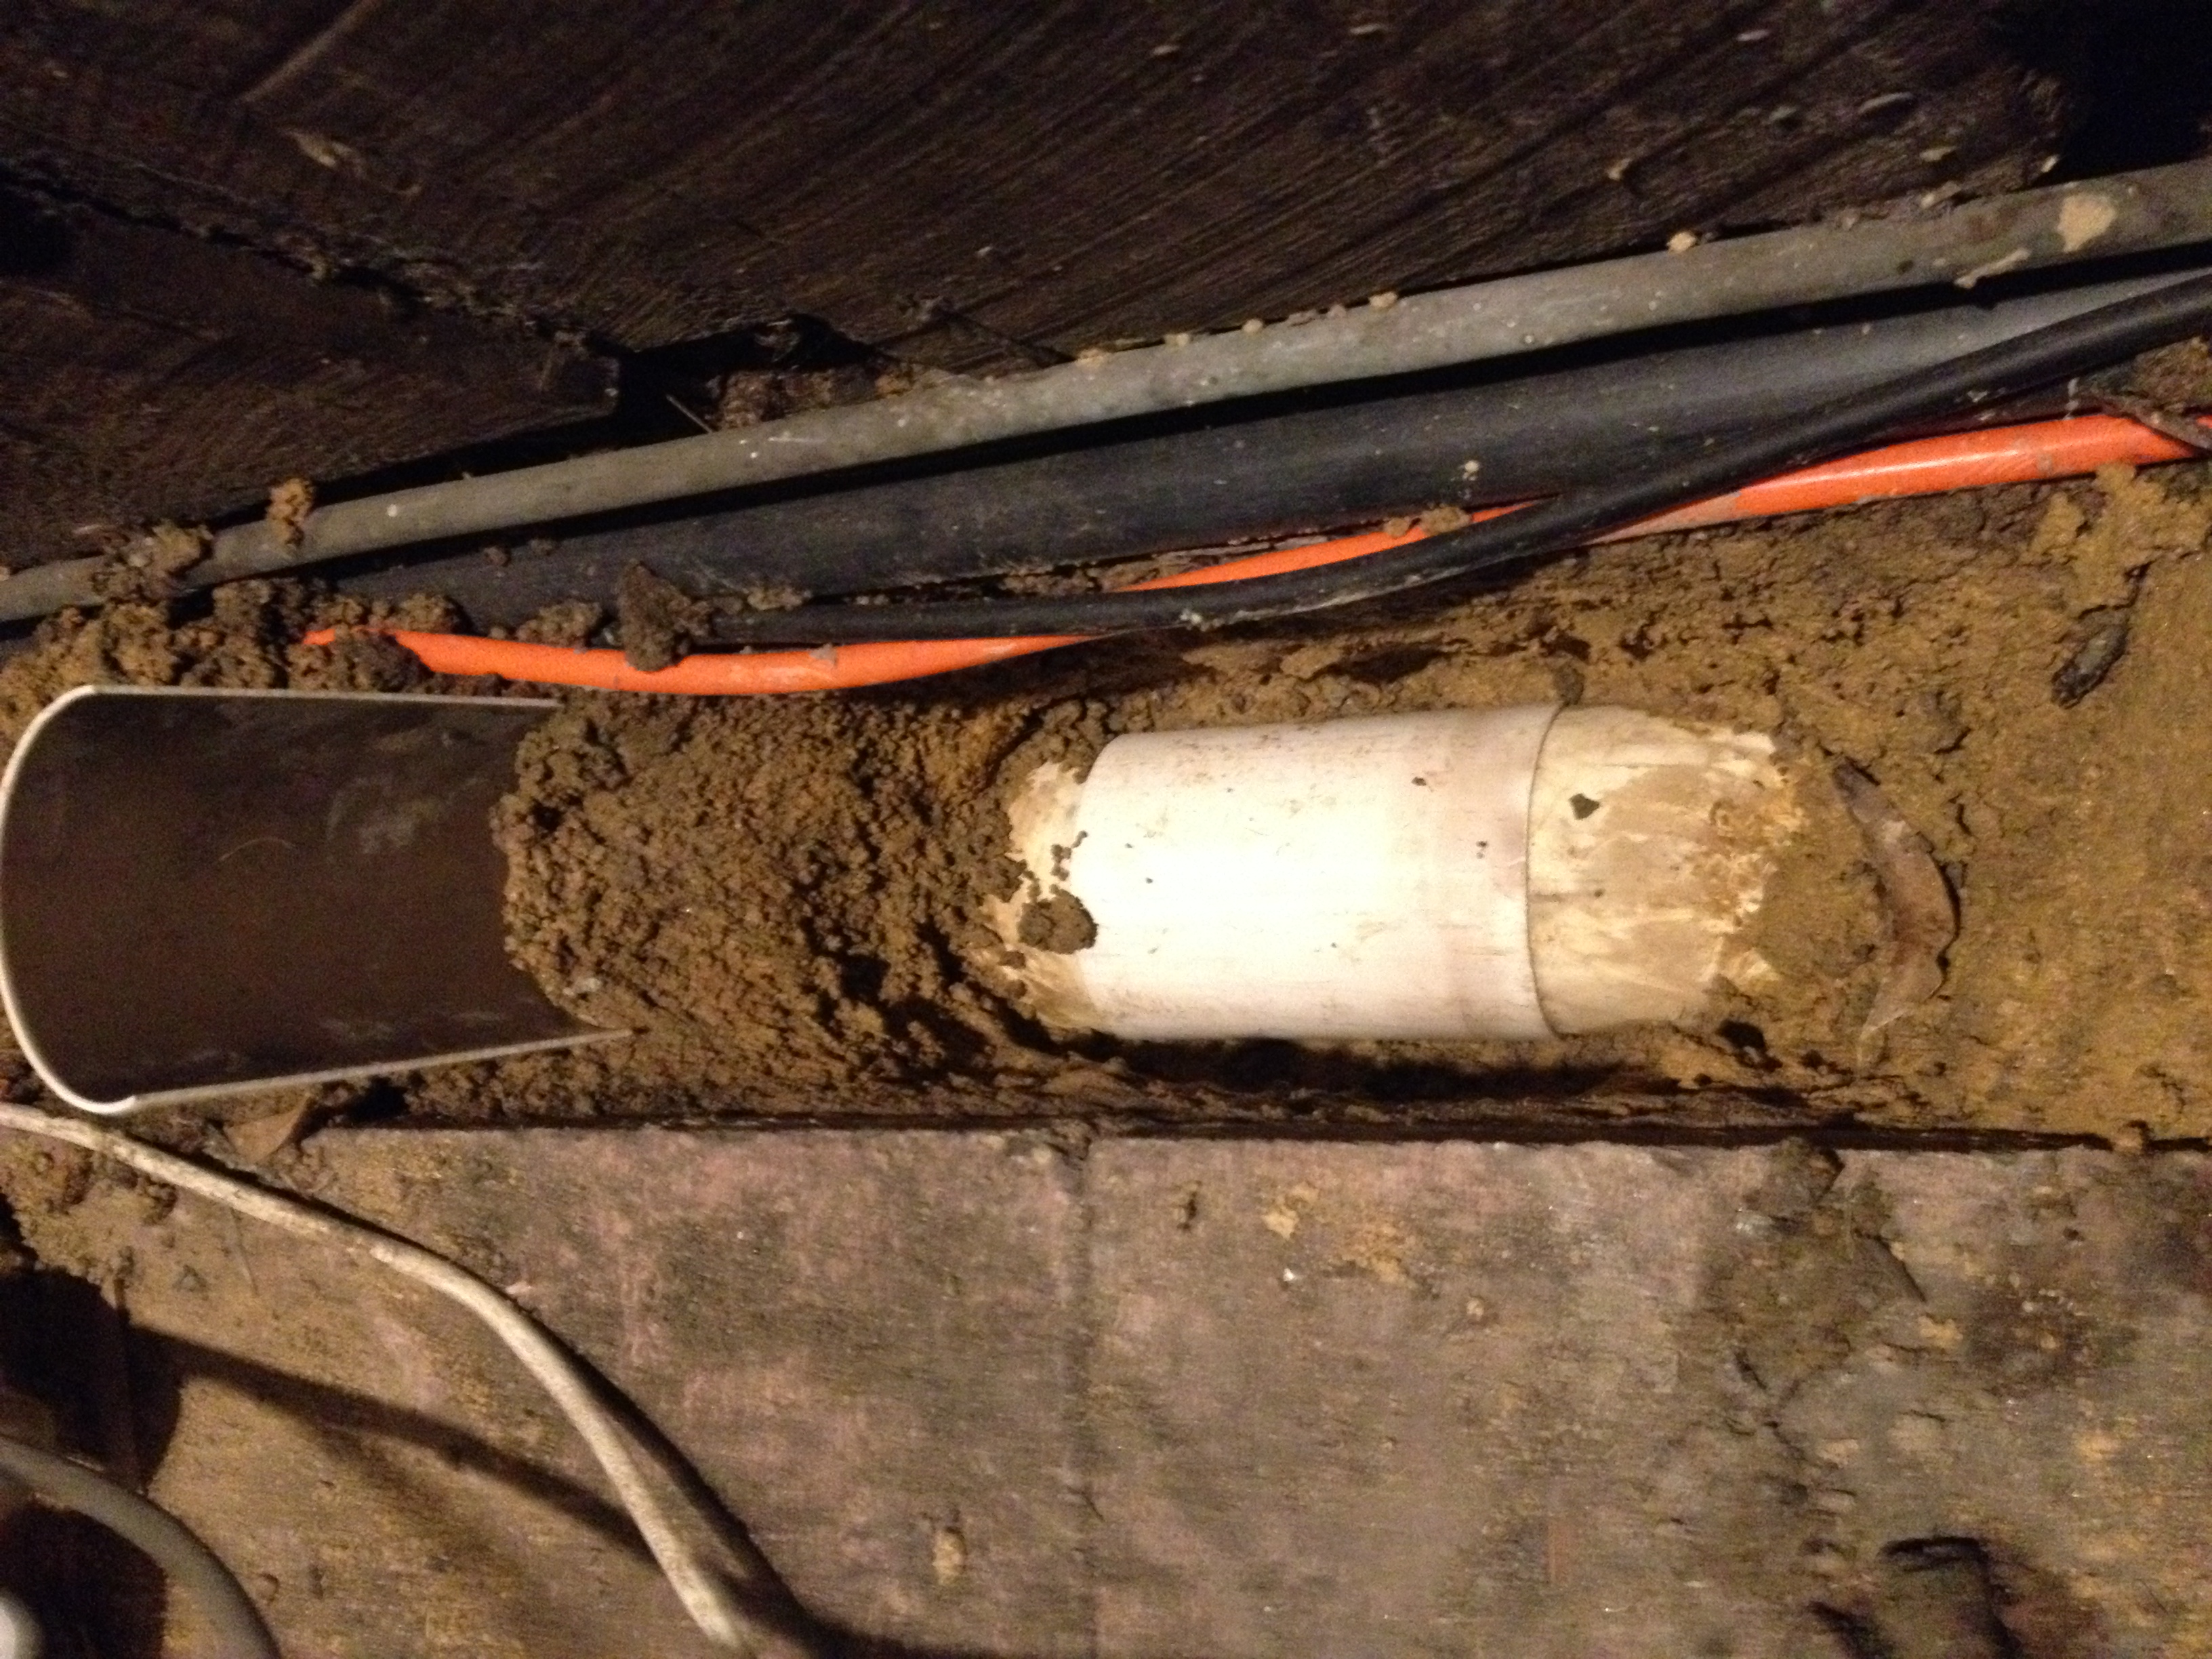
This PVC pipe was leaking grey water through to the surrounding area:
PVC pipe repair
After digging away the soil I found a round hole had been cut into the pipe, but never sealed over. When a sudden rush of water came (e.g. from the washing machine), water would appear to be bubbling up from the ground!
The process to fix this hole was:
Remove clay and soil from around the area
Wipe PVC pipe clean with a damp cloth to remove any soil
Cut another section of PVC lengthways to act as a sleeve (the second half is shown at the top of the photo above)
Prepare the sleeve and PVC pipe using PVC priming fluid
Apply PVC cement to the sleeve and PVC pipe
Place the sleeve over the PVC pipe, covering the hole completely
Slide the sleeve around slightly to ensure a good contact of the glue
The PVC pipe has not leaked since, so the repair was successful!
This is a quick, simple and cheap way to repair a PVC pipe, without having to cut out and replace the damaged pipe.
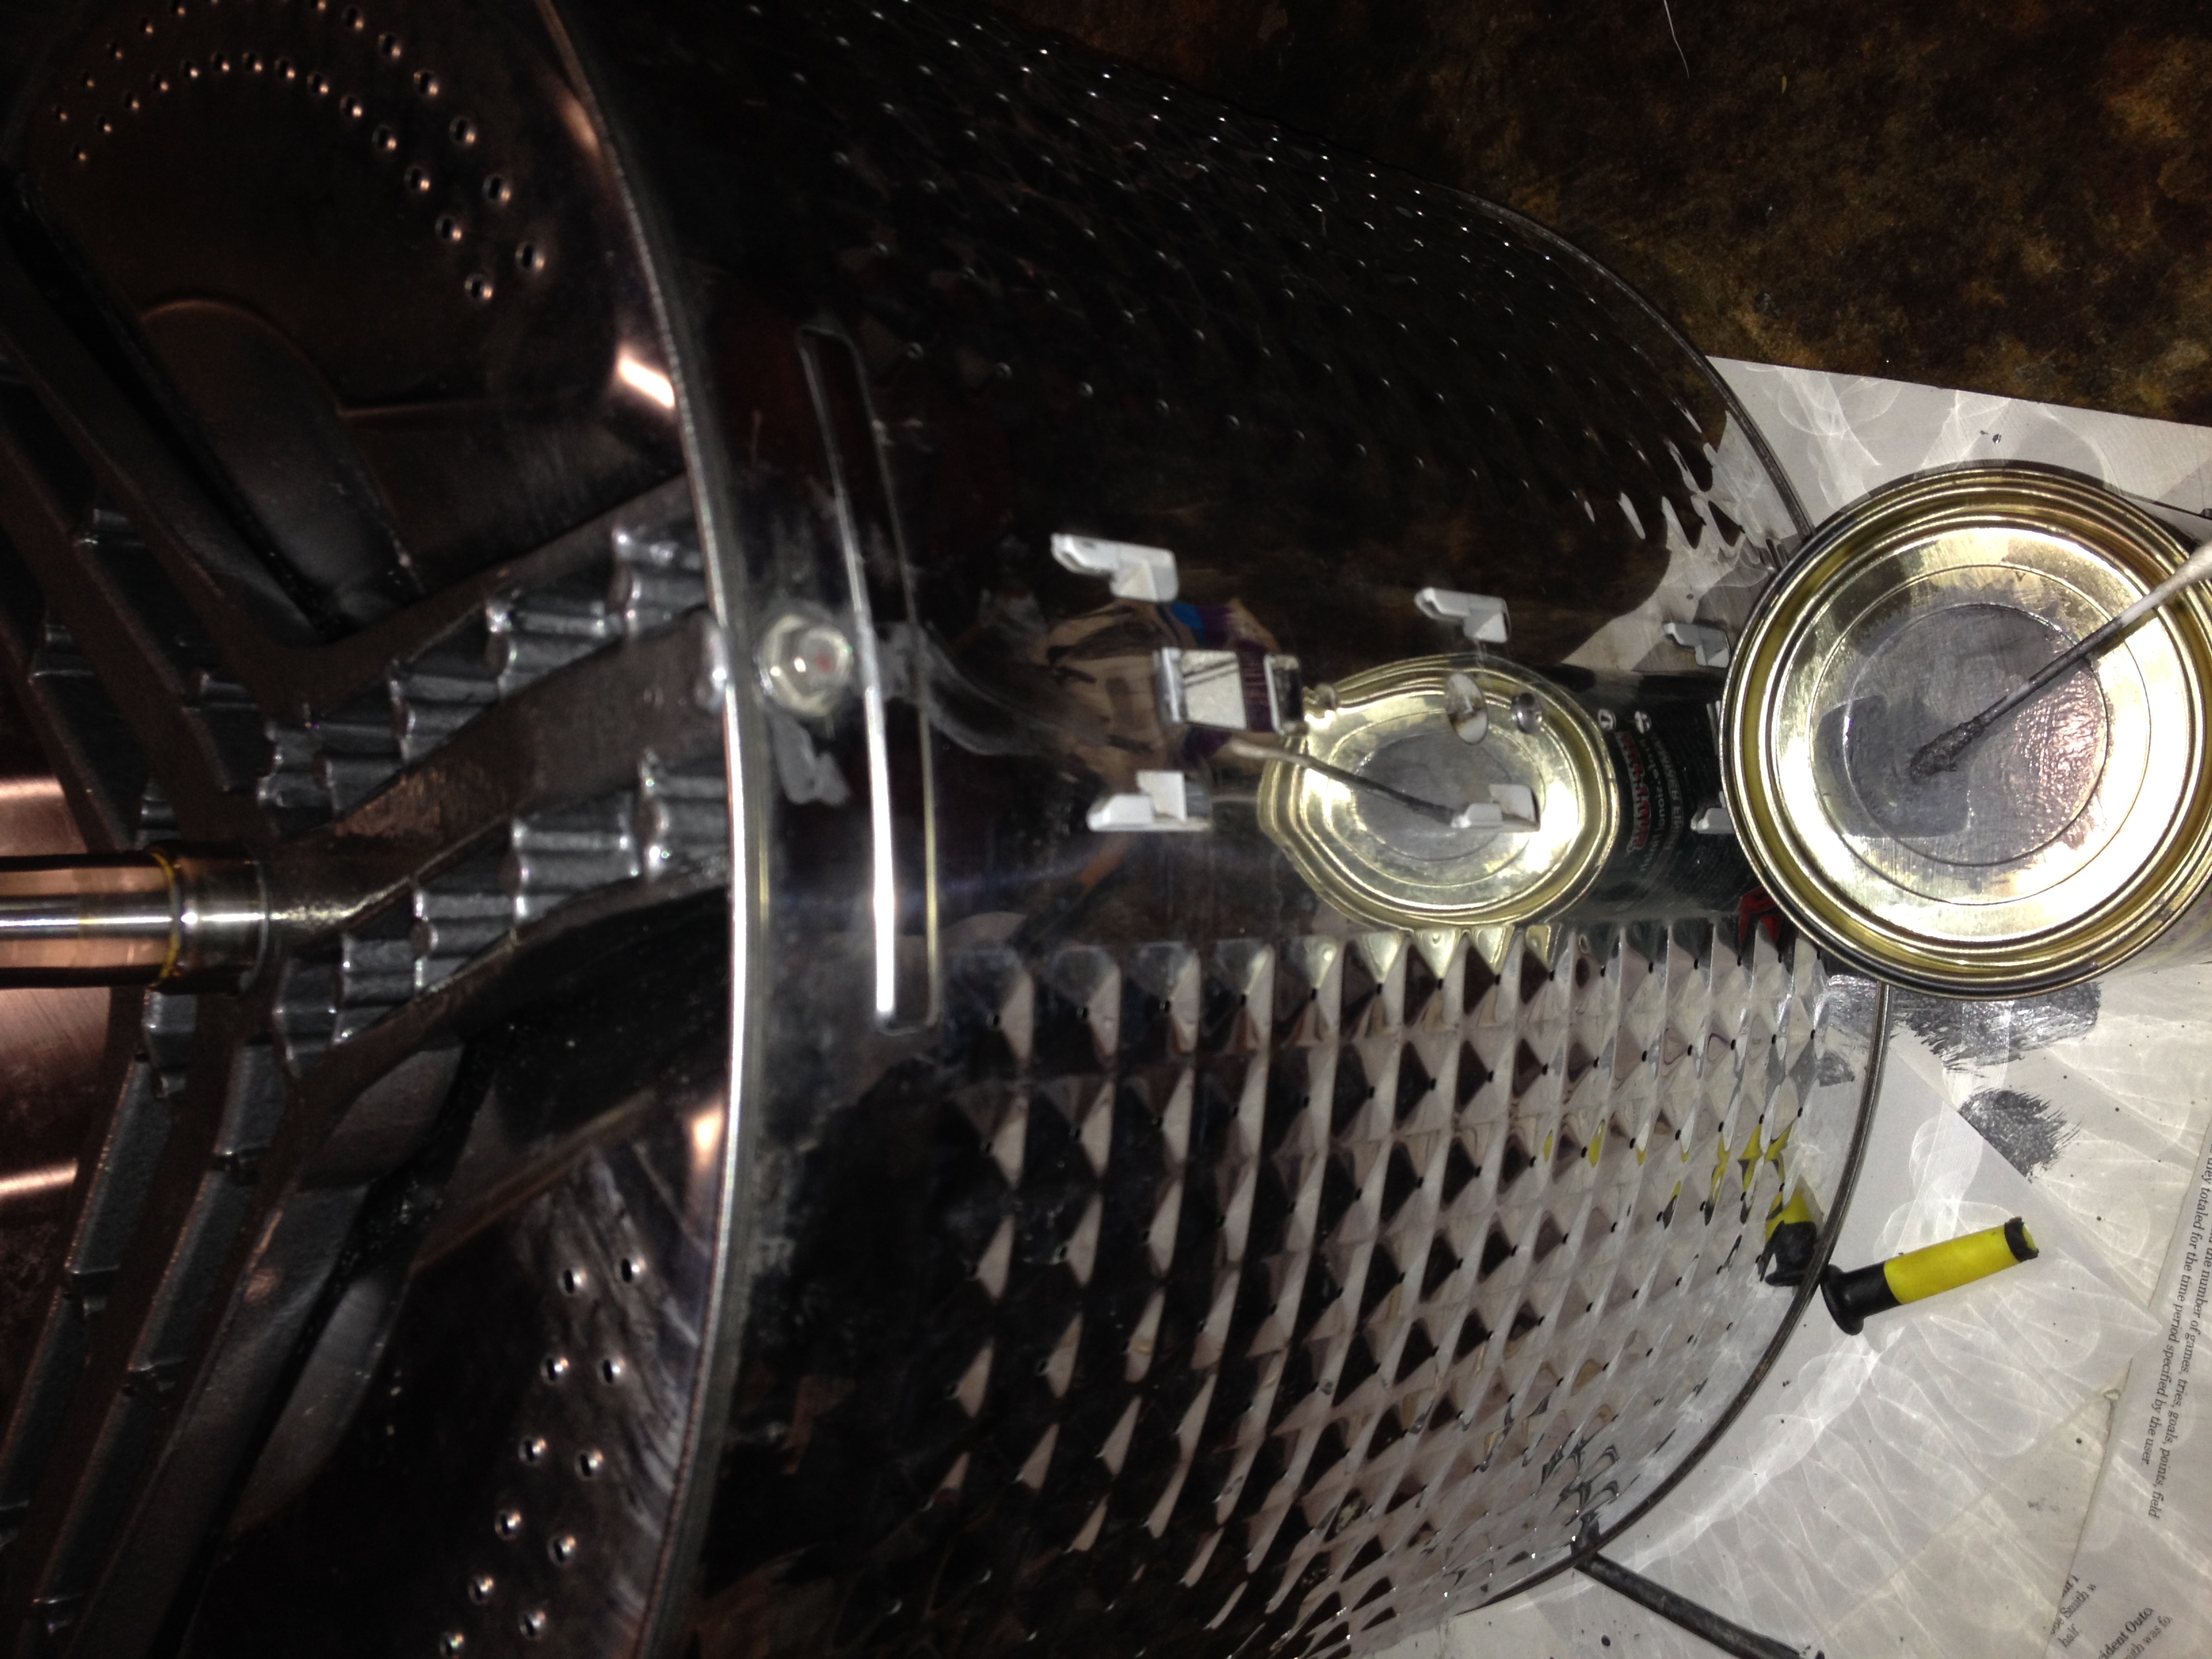
The Samsung front loader washing machine (model WF8802RSW) began making a clunking sound as the drum span around, and clothes weren’t spinning dry. Some damage was visible on the rubber door seal gasket where the drum had been rubbing, but thankfully it hadn’t worn through.
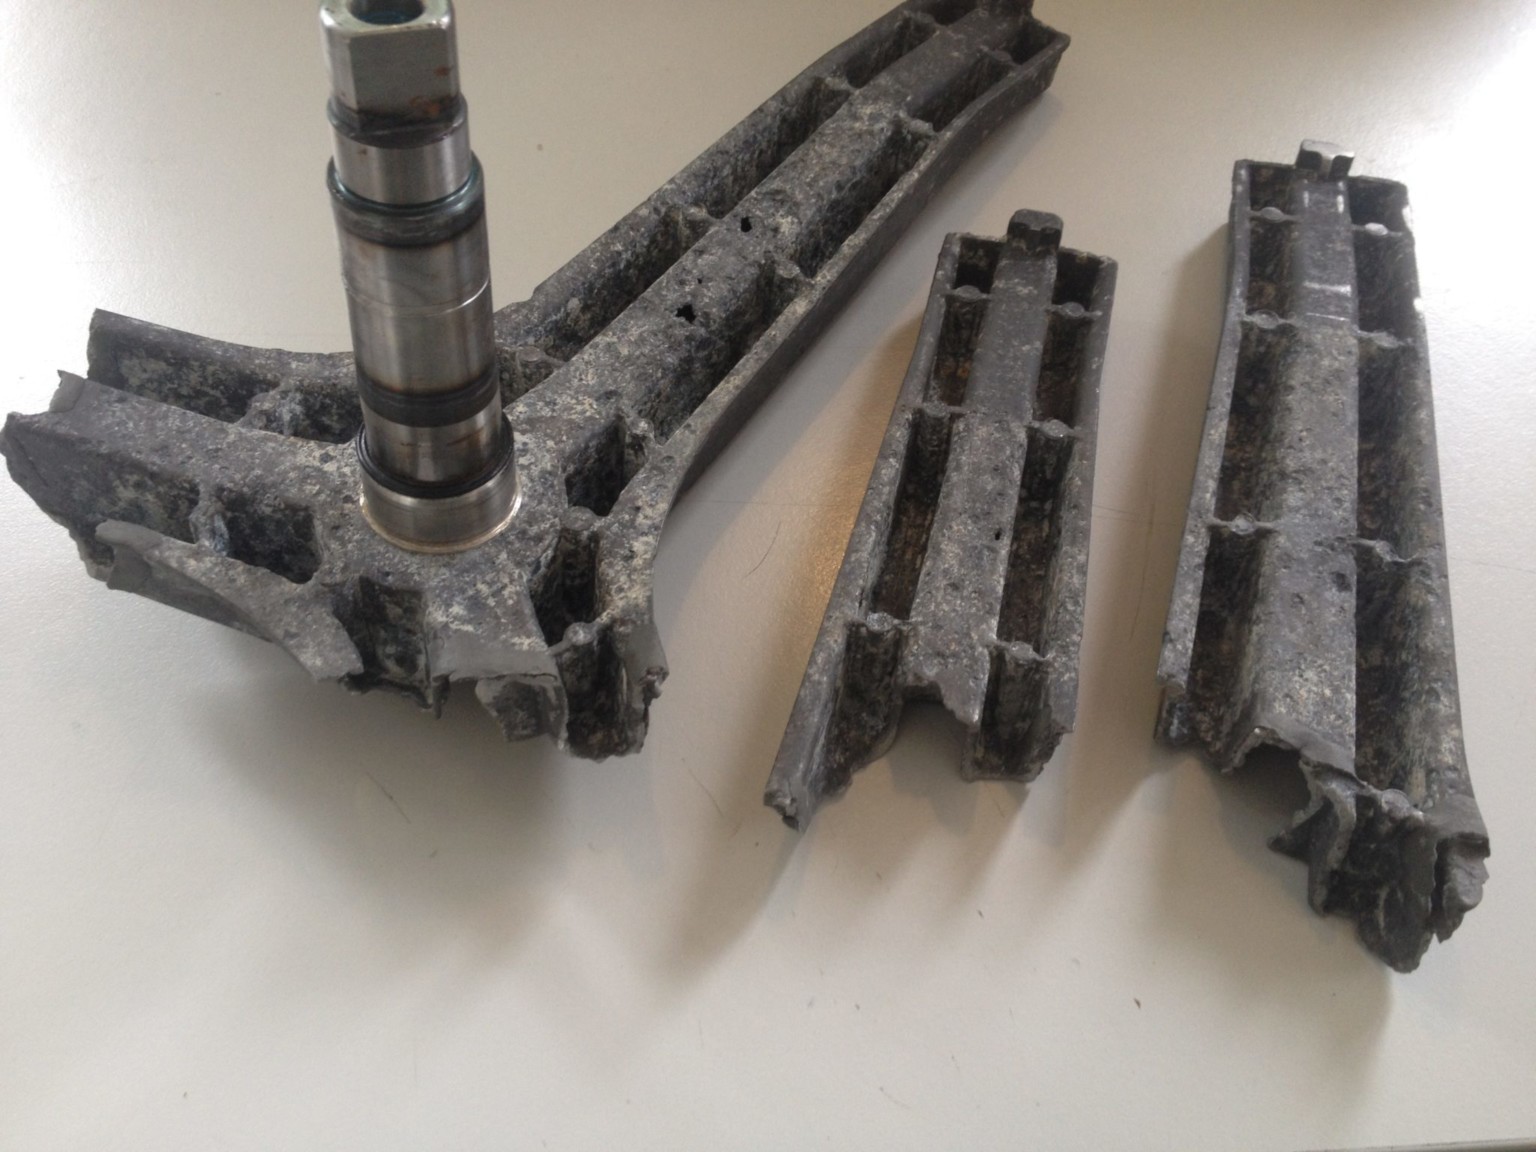
Before opening up the machine, I searched for others with the same problem and found the “spider arm” would often break. This part joins the washing drum to the fly wheel which is then driven by the motor.
I thought the broken arm may be due to overloading with too many clothes (it’s has an 8 kg rating), however after opening the washing machine I soon found what many others had discovered – the spider arm had corroded and broken apart:
Broken spider arm
I’m not sure why spider arms would be manufactured with aluminium, which corrodes in alkaline environments, without any form of protection. I once added caustic soda solution to an aluminium saucepan and it began bubbling with hydrogen gas – not a good idea!
Repair
I tried repairing the broken arm by applying an epoxy, however it was not strong enough and broke apart while seating in the wash drum (some remaining epoxy can still be seen on the photo above). When I had trouble locating a new replacement part, I had considered using fibreglass to repair the spider arm.
Replacement
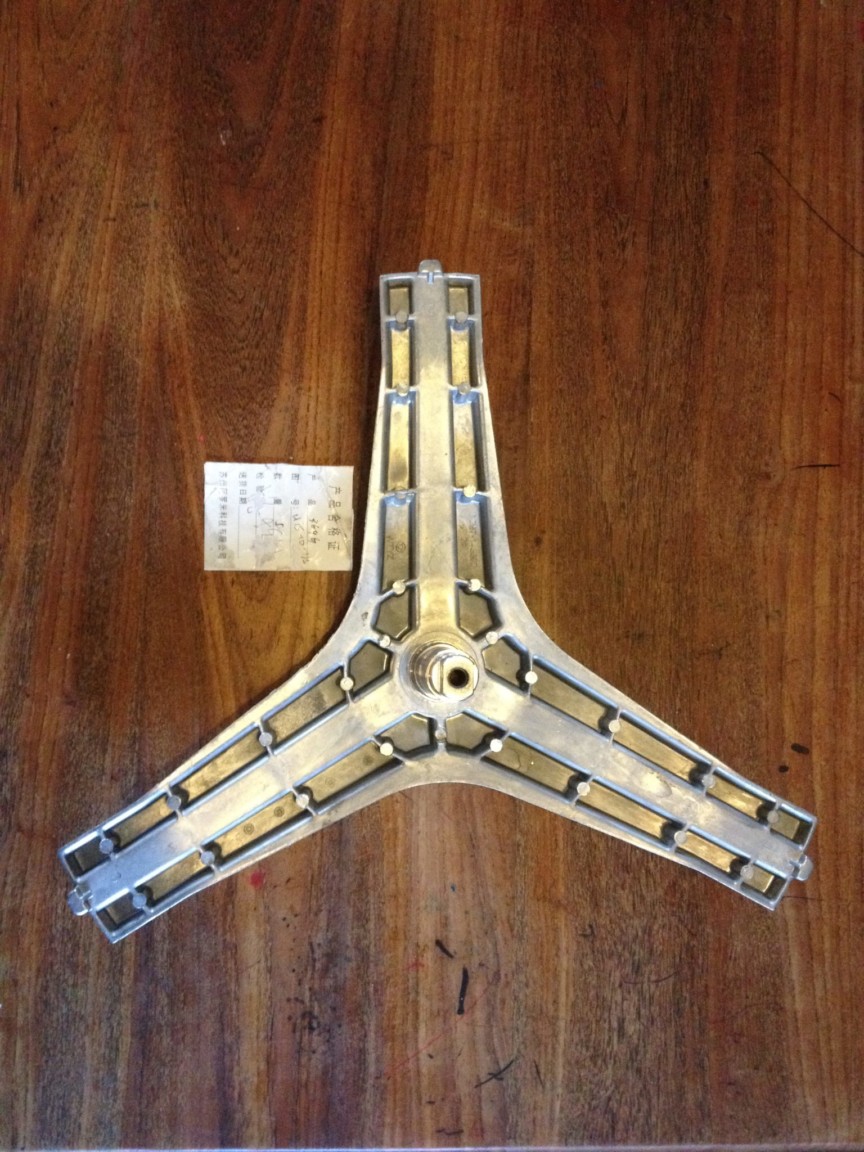
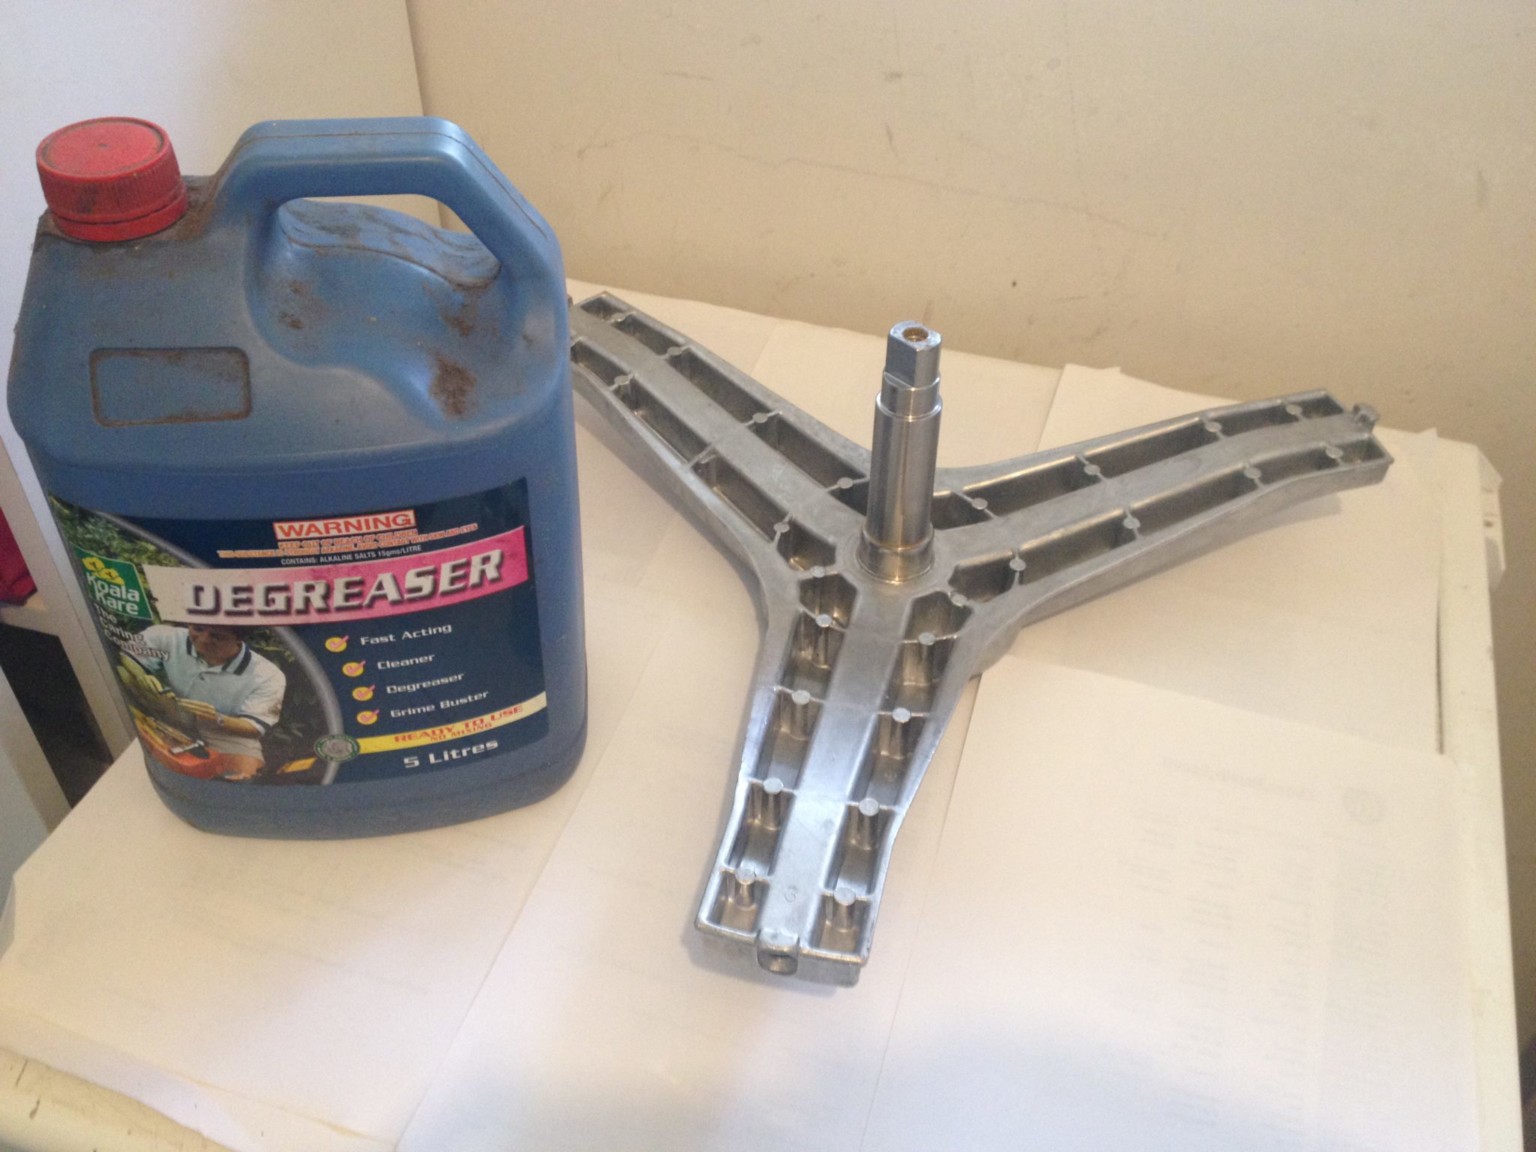
The replacement part (Samsung Spider Assembly Flange Shaft: DC97-14370E) was ordered through eBay and arrived the following week. So this is what a nice, shiny spider arm looks like:
Samsung Spider Assembly Flange Shaft: DC97-14370E
To prevent the same issue of corrosion, I decided to wash and paint the new spider arm before reassembling the front loader:
Spider arm was washed with degreaser and rinsed with the Karcher pressure washer:
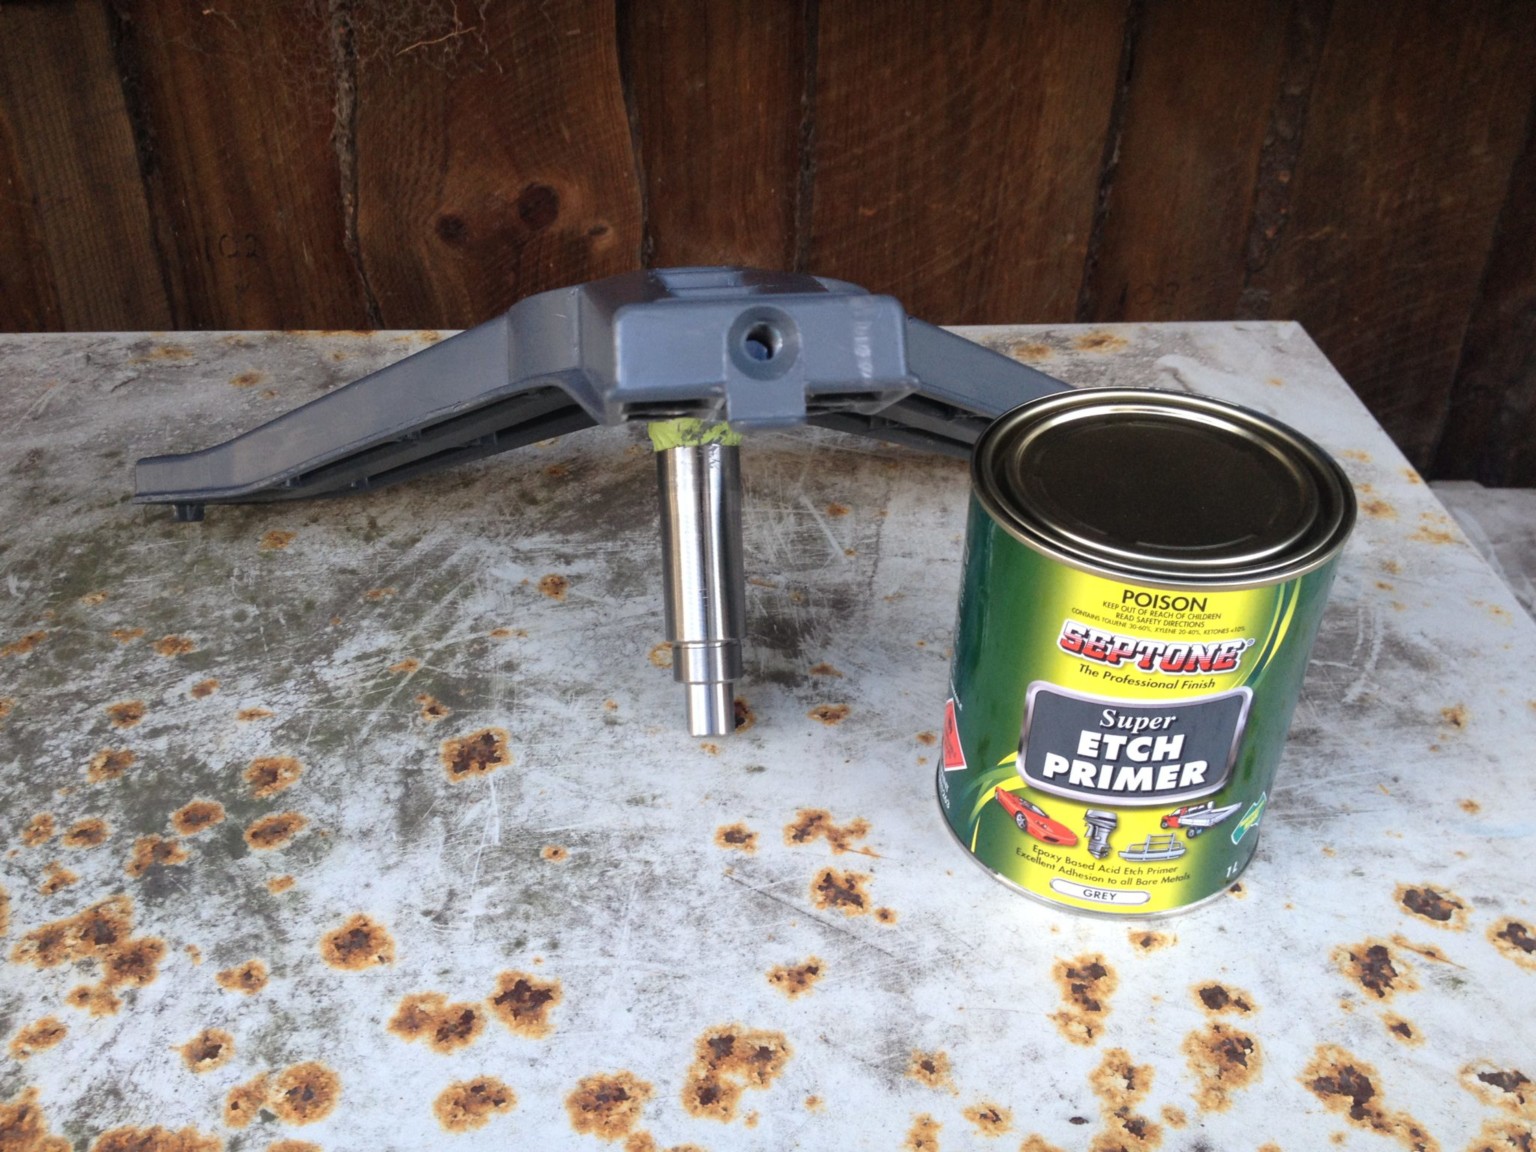
Painted with two coats of Septone Super Etch Primer:
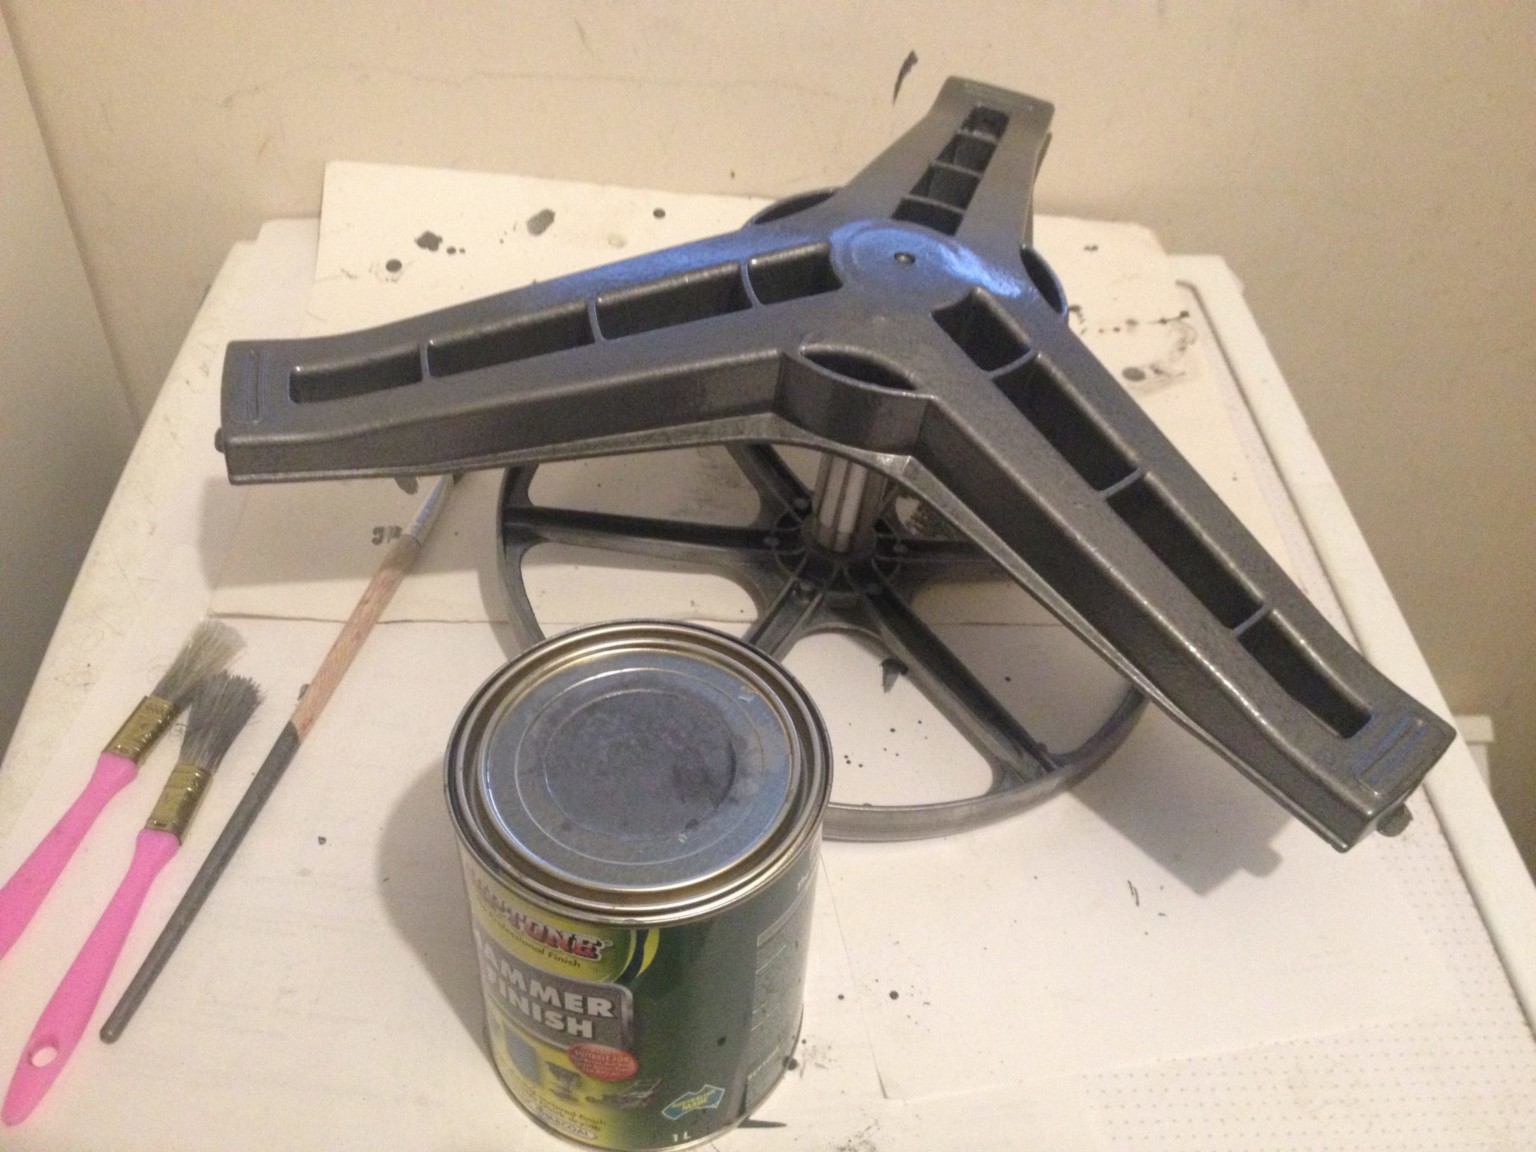
Painted with two coats of Septone Hammer Tone Finish (Charcoal):
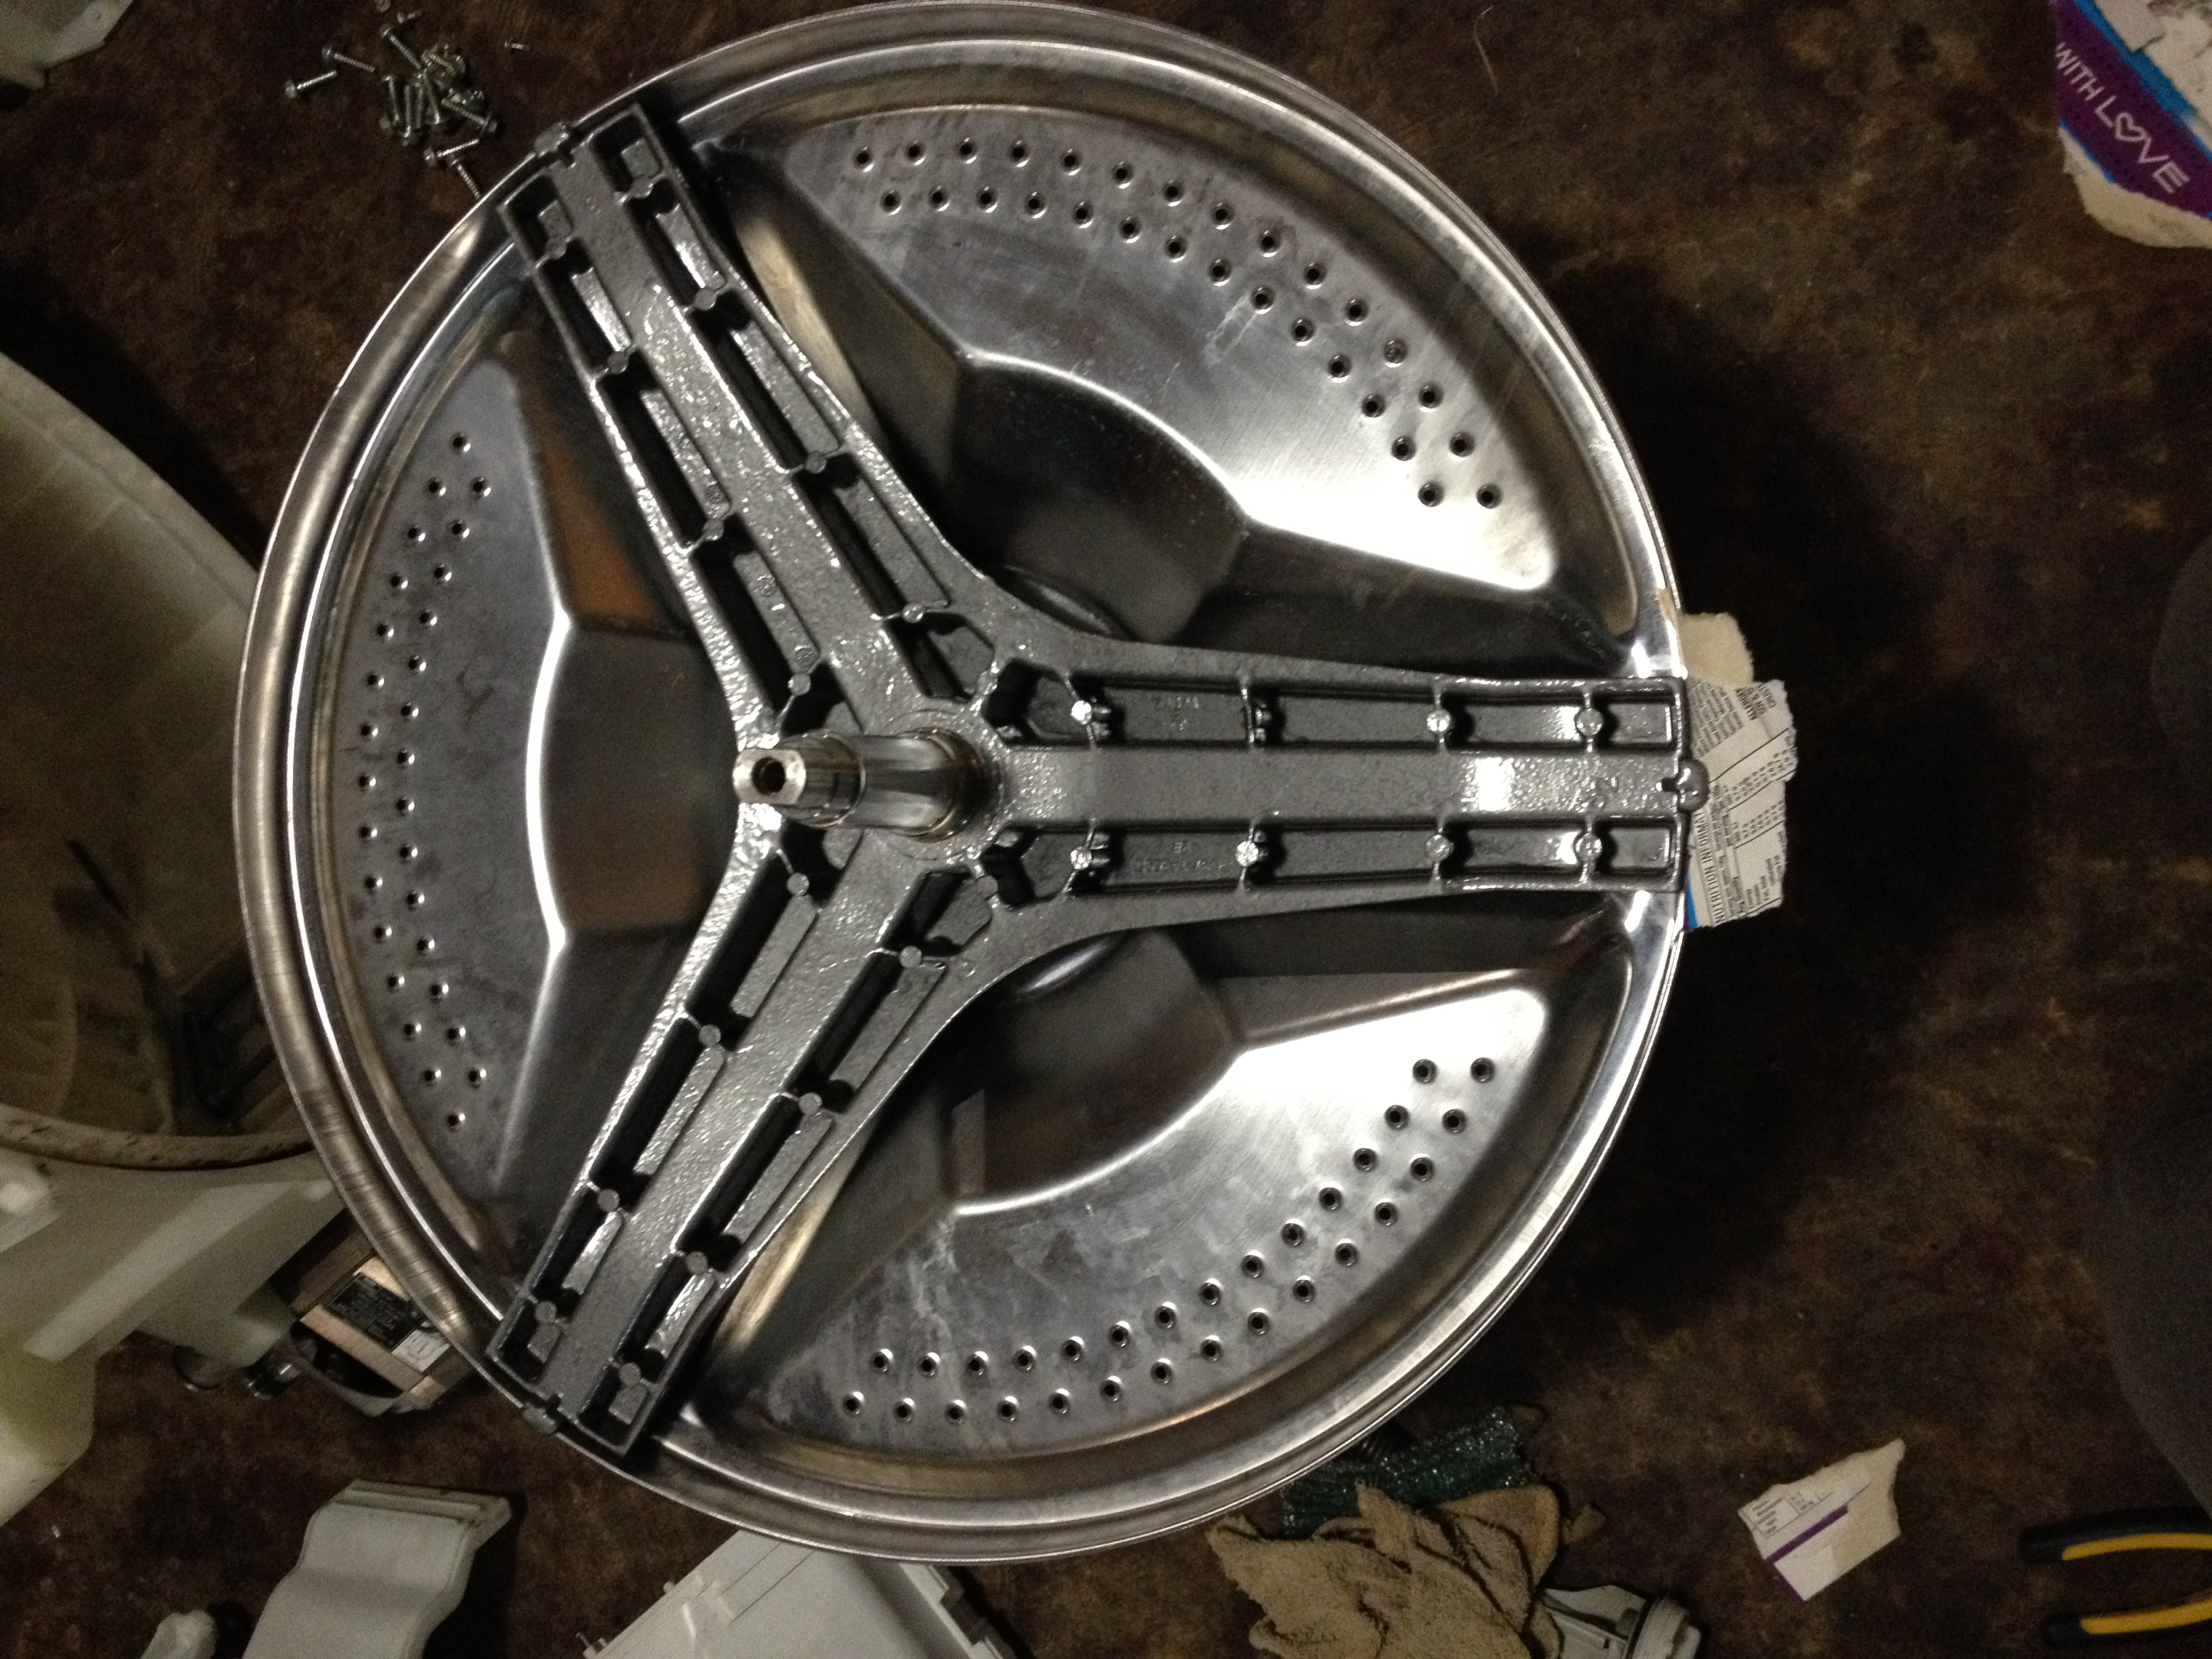
Balance was checked during the process by seating the spider arm in the wash drum and spinning on the bearings. There was no wobbling so everything looked well balanced.
The spider arm was then installed on the drum:
The screw holes were even painted with hammer tone to prevent corrosion:
Although I allowed a day to dry (including sunlight and rest above the wood heater), the first few washes smelt like petrol (i.e. gasoline). That soon disappeared as the clothes freshened up on the clothes line outside. Perhaps a few empty wash cycles would have been a good idea!
Next
If I get time, I would like to open everything up in a few months to inspect the paint and confirm how well the hammer tone paint is protecting the aluminium from corrosion.