Sprouting seeds successfully

I like to save money wherever I can, so when it came to setting up a veggie garden I was happy to buy the seeds and raise them myself rather than buying seedlings. Raising your own seedlings is much more cost effective solution –  so long as the seeds germinate and thrive. We can also enjoy the satisfying achievement of growing them ourselves, and we get to participate in the miracle of life sprouting from lifeless looking seeds.

My experience up until recently had not been terribly successful. Many seeds would not sprout, especially the smaller seeds, despite keeping them moist and warm. A friend then told my wife this may be due to what I was sowing them into.

False economy

In my efforts to further save money, I was sowing seeds into pots filled with soil from my property. This could be a mixture of mulched eucalyptus leaves, sandy topsoil and compost. The compost was generally most successful, however I found this made my peas fail to sprout because they went mouldy:

[photo]

The right mix/True economy

Raising your own seedlings requires further investment in a good seed raising mix. It is false economy to pay for good seeds and sow them into the wrong soil.

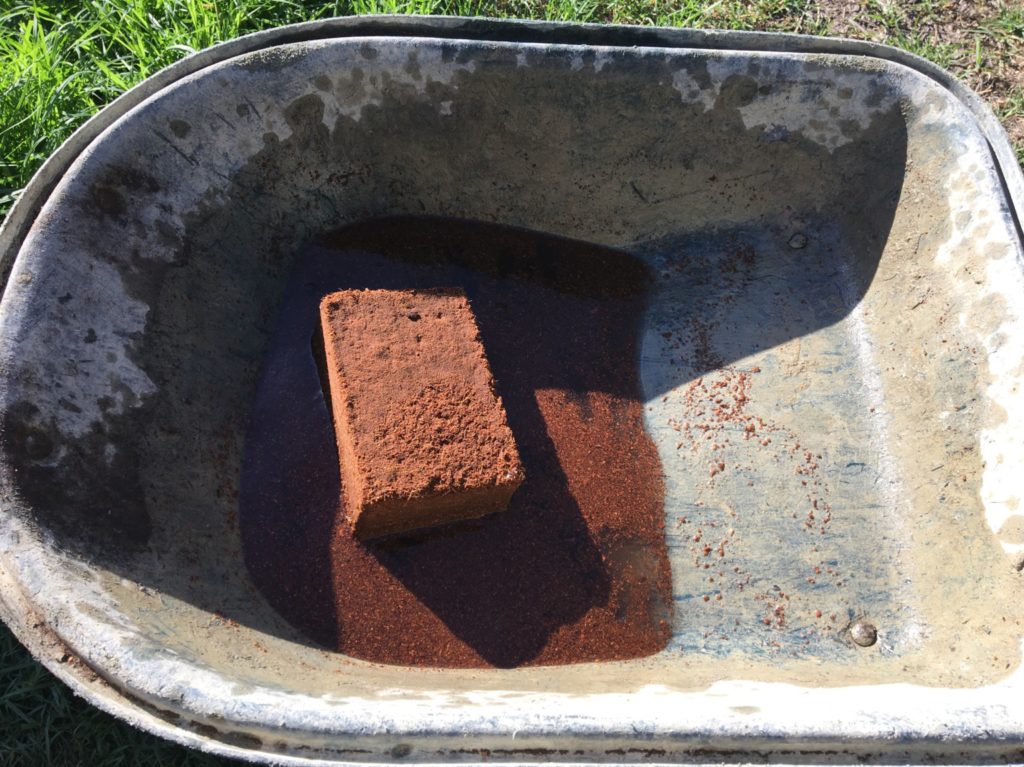
I found different options including pine bark mulch, however I came across a post describing how to make your own from coir and vermiculite. While I haven’t tried this combination yet, I found a “Seed Raising Potting Mix Coir Block” at Bunnings which makes up 15L for $4.75. It’s such an easy recipe – you just add water and stir:

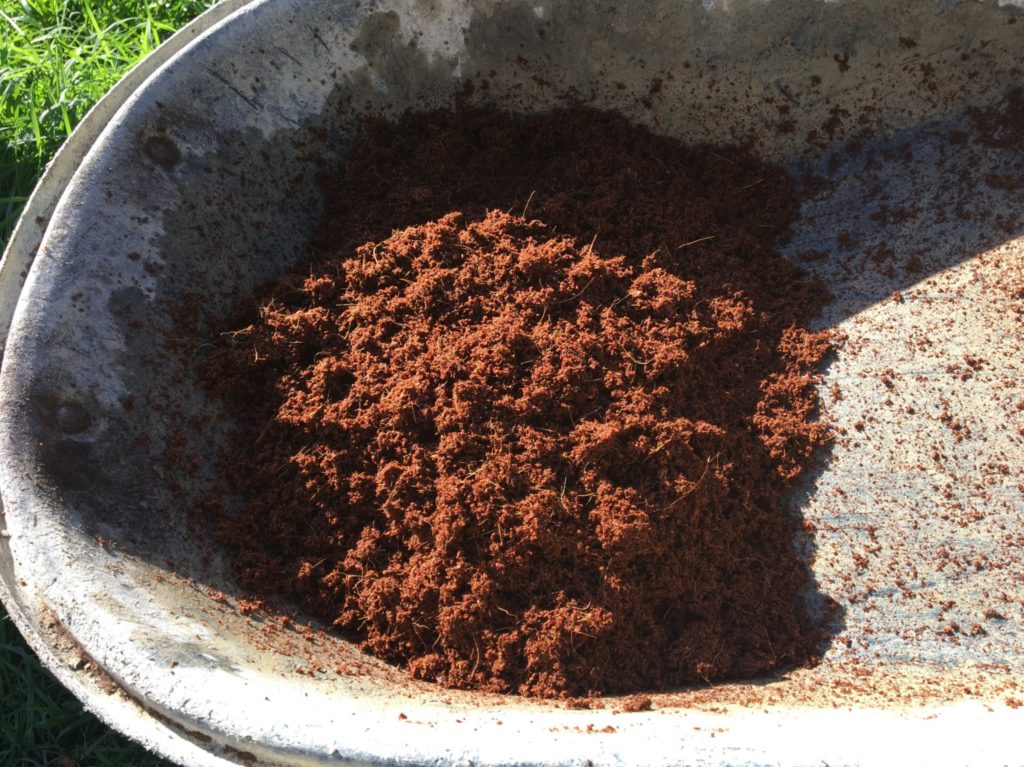
After a few minutes you end up with this really swell result:

I found planter tubes from a local recycled goods shop, rinsed them clean and filled them with the coir mix. The planter tubes sit in a re-used bulk meat tray. A pen lid was used to make holes at the correct depth:

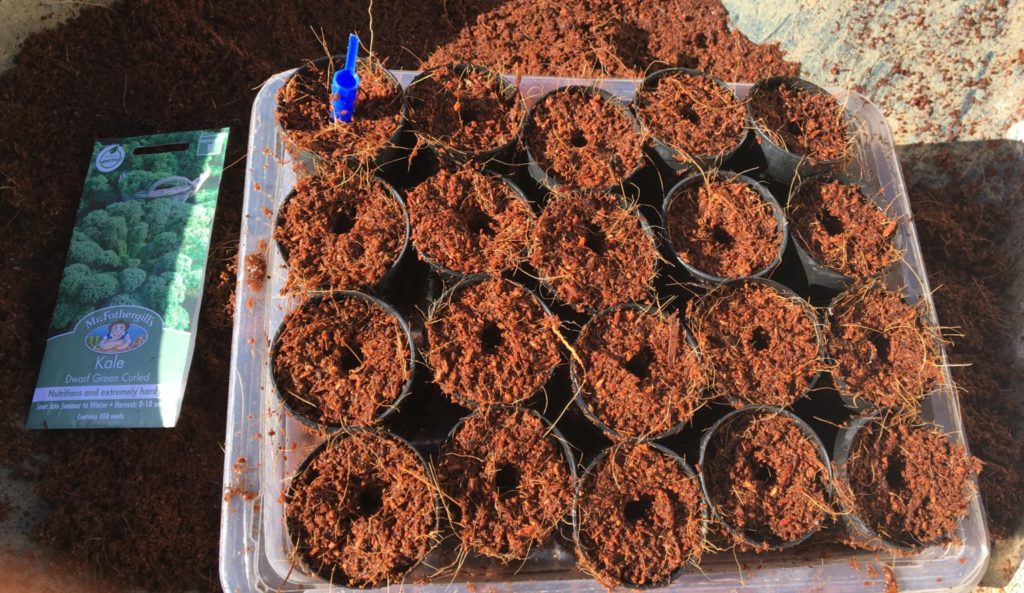
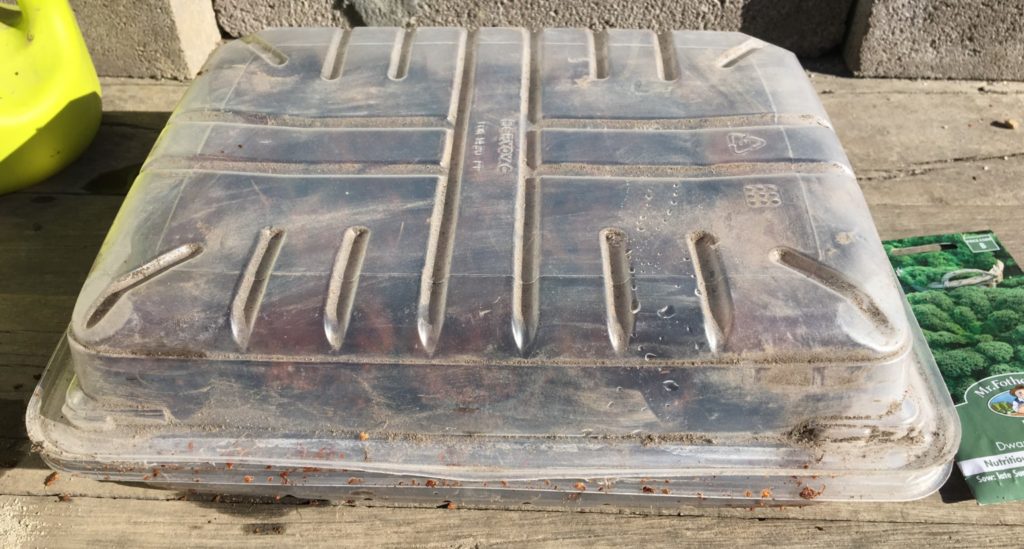
Another meat tray was used as the lid to form a mini greenhouse:

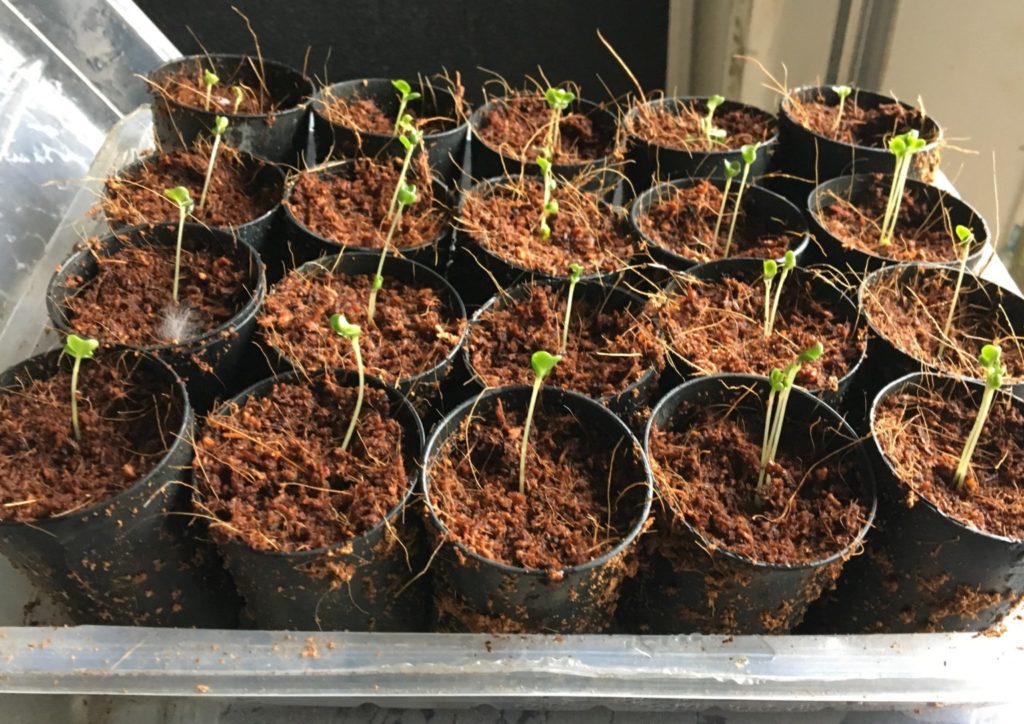
This sat in my office near the window for a few days and he results were amazing. Every tube had sprouted seeds and some more than one:

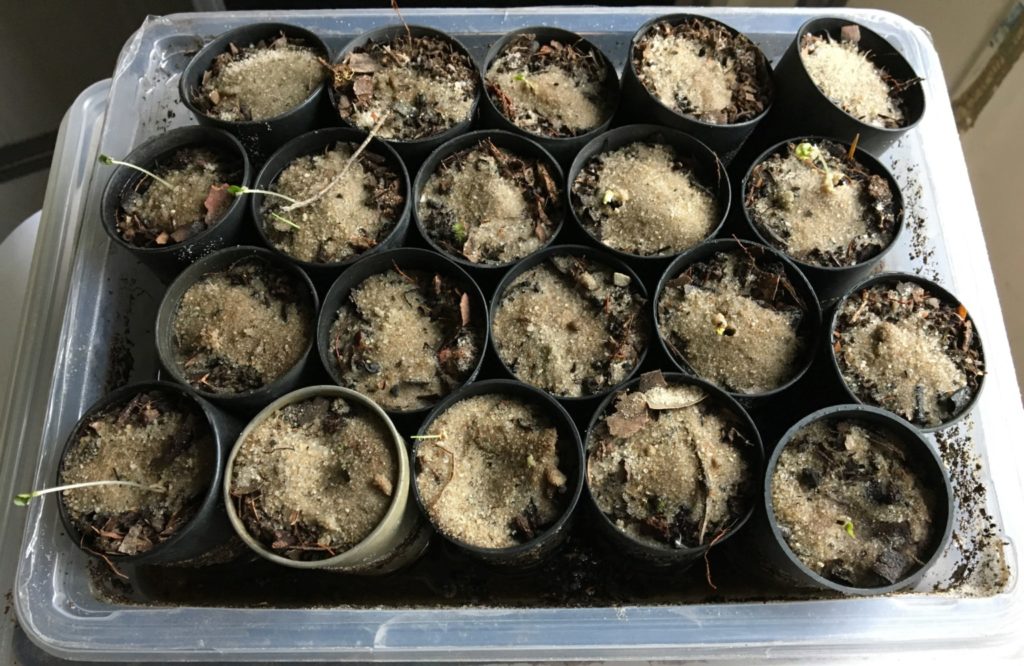
As an experiment I had previously planted Kale seeds into eucalyptus mulch, which still had a smell of eucalyptus oil. This did not absorb the water well so I added water to the bottom tray, then covered each seed with fine sand. As you can see, the germination rate was not very high. The Kale seeds only sprouted in half of the tubes:

The good news/soil

This reminds me of the parable of the sower in Matthew 13. Although the seed was viable in every scenario, Jesus explained that it must land on rich soil to produce a harvest. When our hearts receive and fully embrace the Good News of salvation, it always bears good fruit!

iPad cracked screen repair

A few months ago the screen of my work iPad cracked. Although it had a large protective cover around the edges, it appears something hard was pushed directly against the screen itself. The cracks form a lovely 4-pointed star shape:

Things look even worse on this angle:

Resin to the rescue

I happened to have spare resin left over from a Rain-X Windshield Repair Kit that I’d used on our 4WD and car windscreens, which reduces the appearance of cracks and minimises the chance of bull’s eyes from spreading. These repairs went quite well so I thought this might do the trick on the iPad screen too. It was definitely worth a crack!

After cleaning the screen carefully, I pushed the applicator base onto the screen so the centre ring was directly above the central impact point. I then  positioned the applicator and adjusted the suction cup legs to ensure the suction cups were not covering any of the cracks:

The resin chamber was then screwed into the centre ring, so the rubber mouth sat directly on top of the point of impact:

A few drops of resin were then squeezed into the resin chamber and the pressure driver screwed on to apply resin into the cracks. Additional resin was also applied directly from the bottle into sections of the cracks that hadn’t been filled from the resin chamber. I actually ran out of resin in the end, but it was enough to do a decent job.

The applicator was removed as per instructions, and curing strips applied to cover all of the cracks:

The iPad was then placed in the sun, as the resin is cured by Ultra Violet (UV) light. I actually had to take it out of the sun a few times because the black screen overheated in direct sunlight, and iOS showed the high temperature warning until it had cooled down again.

When the resin had hardened, the curing strips were removed and excess resin scraped away using a razor blade.

A cracker solution!

Overall I am quite happy with the result. The cracks have changed from a distinct line to a dotted and dashed line which is much harder to see – and harder to photograph!

My mother in law was using this iPad recently and didn’t even realise the screen was cracked until she went outside! The photo below was taken outside in the sunshine to show how the crack is still visible under very bright light at the correct angle:

Although the cracks are still slightly noticeable, it’s a vast improvement over the original condition. I might not go out and buy a windscreen repair kit just to fix a cracked tablet or phone screen, although it’s definitely a viable option if you don’t have the time to replace the screen yourself or the money to have someone else fix it.

Clock repair

The lounge room clock was faulty and would not keep correct time. I’d tried replacing the battery however it would soon start lagging again. One thing worse than a clock that’s stopped is a clock that starts and stops – such a waste of time! I don’t wear a watch and kept glancing up at the blank wall where the clock should be, so I knew it was about time to get this fixed.

I’ve pulled many things apart before, and found that without a reference it’s often a case of trial an error to put it back together correctly. So without a second thought, I took a close up photo geared towards showing the minute details of the clock mechanism:

Clock mechanism

After removing the battery terminal, cogs and wound coil, the cause of the problem was soon obvious – green corrosion around the power supply on the circuit board.

To fix this:

  1. Wash away green oxide buildup using methylated spirits and a cotton stick
  2. Clean off the oxide using a smooth file or fine sand paper
  3. Wash remaining oxide using more metho
  4. Reassemble the clock mechanism, using the photo as a reference for the gears
  5. Insert a fresh battery
  6. Wait for a second

Everything went together again, and I’ve not lost any more time on this clock for a few months now.

PVC grey water pipe repair

This PVC pipe was leaking grey water through to the surrounding area:

PVC pipe repair
PVC pipe repair

After digging away the soil I found a round hole had been cut into the pipe, but never sealed over. When a sudden rush of water came (e.g. from the washing machine), water would appear to be bubbling up from the ground!

The process to fix this hole was:

  1. Remove clay and soil from around the area
  2. Wipe PVC pipe clean with a damp cloth to remove any soil
  3. Cut another section of PVC lengthways to act as a sleeve (the second half is shown at the top of the photo above)
  4. Prepare the sleeve and PVC pipe using PVC priming fluid
  5. Apply PVC cement to the sleeve and PVC pipe
  6. Place the sleeve over the PVC pipe, covering the hole completely
  7. Slide the sleeve around slightly to ensure a good contact of the glue

The PVC pipe has not leaked since, so the repair was successful!

This is a quick, simple and cheap way to repair a PVC pipe, without having to cut out and replace the damaged pipe.

Samsung front loader spider arm replacement

Problem

The Samsung front loader washing machine (model WF8802RSW) began making a clunking sound as the drum span around, and clothes weren’t spinning dry. Some damage was visible on the rubber door seal gasket where the drum had been rubbing, but thankfully it hadn’t worn through.

Before opening up the machine, I searched for others with the same problem and found the “spider arm” would often break. This part joins the washing drum to the fly wheel which is then driven by the motor.

I thought the broken arm may be due to overloading with too many clothes (it’s has an 8 kg rating), however after opening the washing machine I soon found what many others had discovered – the spider arm had corroded and broken apart:

Broken spider arm
Broken spider arm

I’m not sure why spider arms would be manufactured with aluminium, which corrodes in alkaline environments, without any form of protection. I once added caustic soda solution to an aluminium saucepan and it began bubbling with hydrogen gas – not a good idea!

Repair

I tried repairing the broken arm by applying an epoxy, however it was not strong enough and broke apart while seating in the wash drum (some remaining epoxy can still be seen on the photo above). When I had trouble locating a new replacement part, I had considered using fibreglass to repair the spider arm.

Replacement

The replacement part (Samsung Spider Assembly Flange Shaft: DC97-14370E) was ordered through eBay and arrived the following week. So this is what a nice, shiny spider arm looks like:

Samsung Spider Assembly Flange Shaft: DC97-14370E

To prevent the same issue of corrosion, I decided to wash and paint the new spider arm before reassembling the front loader:

  1. Spider arm was washed with degreaser and rinsed with the Karcher pressure washer:
    Spider arm washed
  2. Painted with two coats of Septone Super Etch Primer:Spider arm painted with Septone "Super Etch Primer"
  3. Painted with two coats of Septone Hammer Tone Finish (Charcoal):Spider arm painted with Septone "Hammer Finish" (Charcoal)

Balance was checked during the process by seating the spider arm in the wash drum and spinning on the bearings. There was no wobbling so everything looked well balanced.

The spider arm was then installed on the drum:

Spider arm placed in washing machine drum

The screw holes were even painted with hammer tone to prevent corrosion:

Screw holes painted with hammer tone paint

Although I allowed a day to dry (including sunlight and rest above the wood heater), the first few washes smelt like petrol (i.e. gasoline). That soon disappeared as the clothes freshened up on the clothes line outside. Perhaps a few empty wash cycles would have been a good idea!

Next

If I get time, I would like to open everything up in a few months to inspect the paint and confirm how well the hammer tone paint is protecting the aluminium from corrosion.